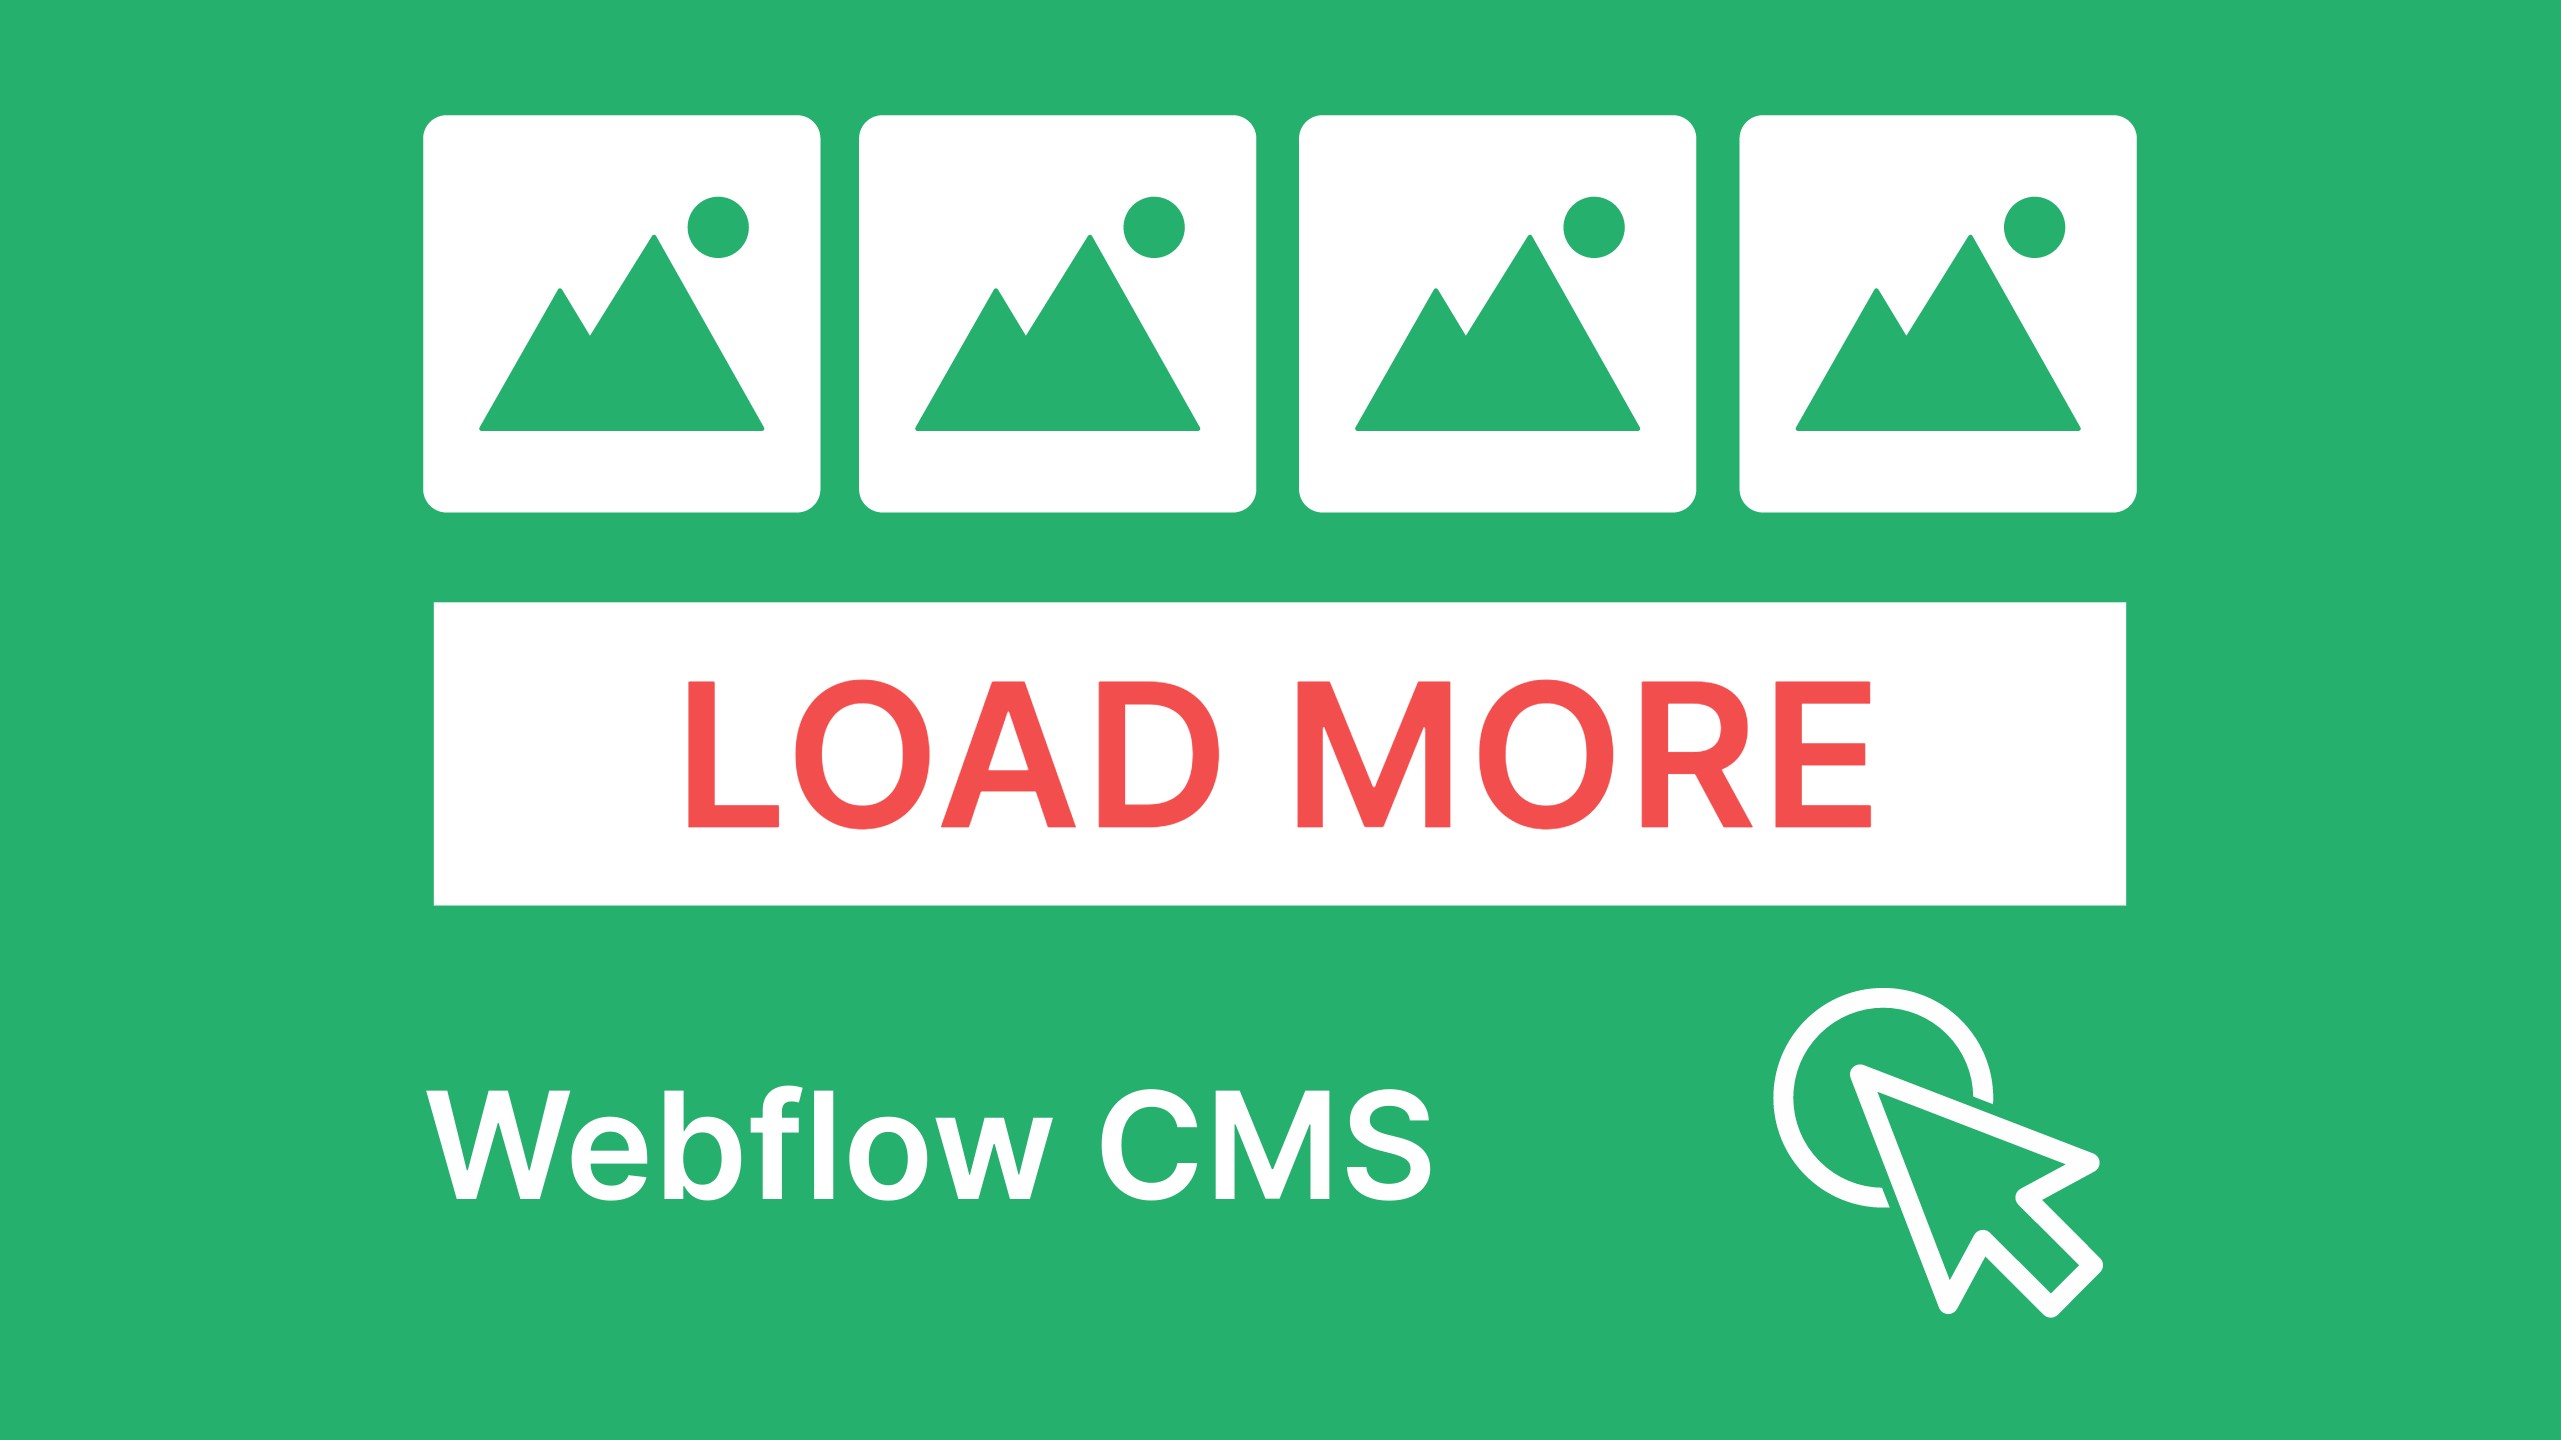
If you ever wondered what is the best way to show your CMS content, this case-study will answer your question.
Webflow content management system [CMS] is a great way to create collection lists and showcase content to your website visitors. You can use them to create collections of your blog posts, service pages, team members, vacancies, reviews, and many other things. For different plans, Webflow allows creating from 2 000 up to 10 000 units per collection.
There're three common ways to display content from the same collection:
Webflow Collection list module uses pagination: it breaks the collection units into pages with a limited number of units per page. However, UX-wise, it might not be user-friendly, and the other two methods - load more content and infinite scroll - can be a better solution.
In this case study, I'll show you how to substitute pagination with the ‘load more’ button with a little bit of custom code. But don't worry if you don't know how to code - you won't have to do it. I'll share with you the code I used for a project of mine. You can reuse it for your Webflow project.
Let's go!
The most important advantage of the 'Load more' button and infinite scroll is that they don't hide the page content you already loaded. Compared to the pagination method, you lose the items you saw on the previous page out of sight. So if you want to get back to some of them, you have to click, worse if multiple times. It's the point when you might lose your audience’s patience and your potential clients.
Remember one of the critical principles to boost your website conversion — the fewer clicks, the better.
Designers use the 'Load more' button to simplify the user journey and still give them control. It provides them with a clear way to their (explore more content) goal and doesn't bear them with options. It just says, "click this button if you want to see more results".
As for the infinite scroll — the no-click method, you might think that's the best way for your website conversion. Well, it depends on your goals. You should use this method to build a community platform such as social media or a portfolio website with lots of projects. Use the infinite scroll in your design to engage your visitors to spend more time on your website or app.
But on the other hand, some websites are not made to keep user attention for long. For example, on a majority of company websites, a user has a short journey:
In this configuration, spending more time on the site content can be harmful to conversion. Users may get distracted from their initial intent - getting the service.
Therefore, the infinite scroll is suitable for social media and portfolios. For any other cases, you should use the 'Load more' button.
So to sum the advantages of having the ‘Load more’ button:
Let's move to the case study.
Last year I worked with a real estate broker from Toronto. I built a website for the client where he showcases his portfolio of sold and available properties.
I used Webflow CMS tools to make it easier for my client to add, edit and manage listings on his website. For showcasing the properties, I used the collection list element from the ‘Add’ panel. It natively has pagination as the default option. Later I substituted the pagination with the 'Load more' button because:
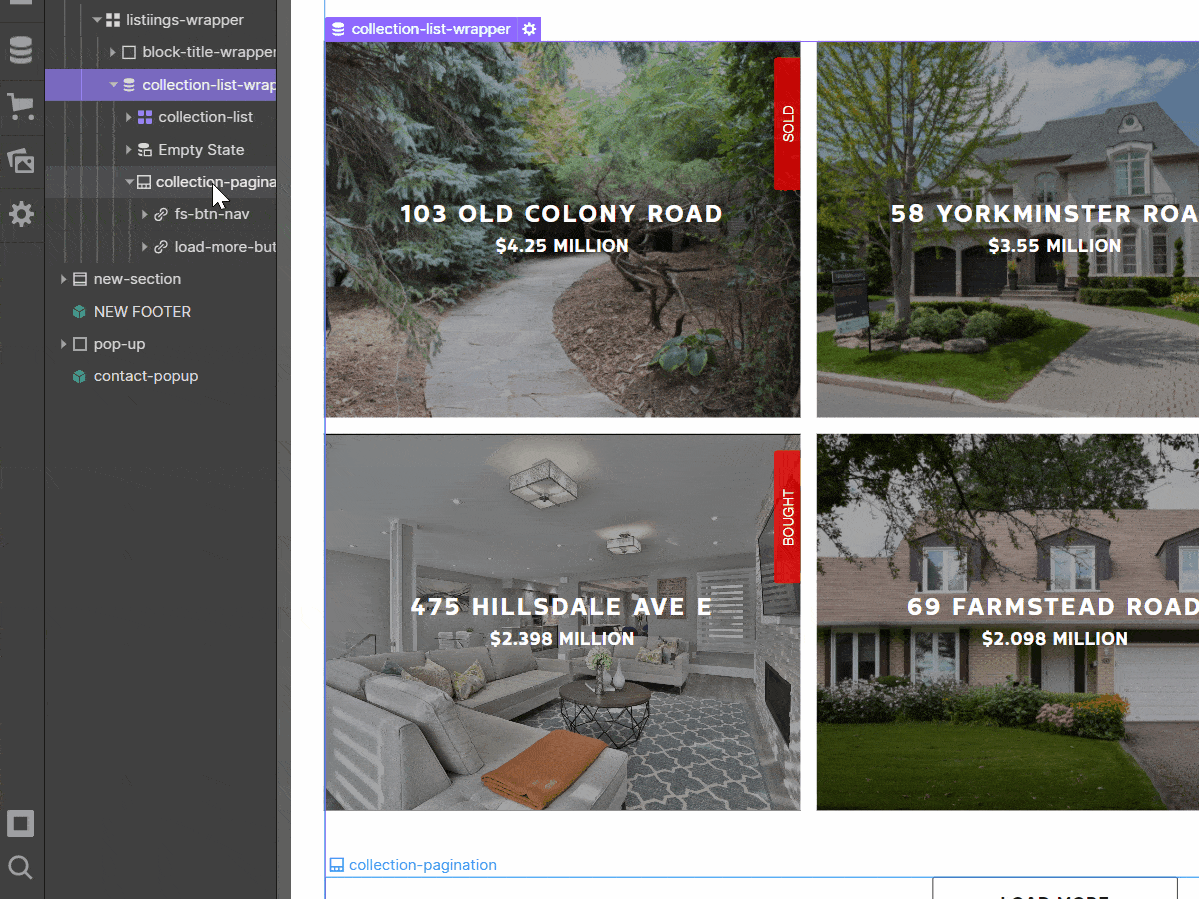
After researching the best practices for product lists, I designed a beautiful grid for the collection list limited with 6 items at the start and 3 items per row. It loads six more items on click.
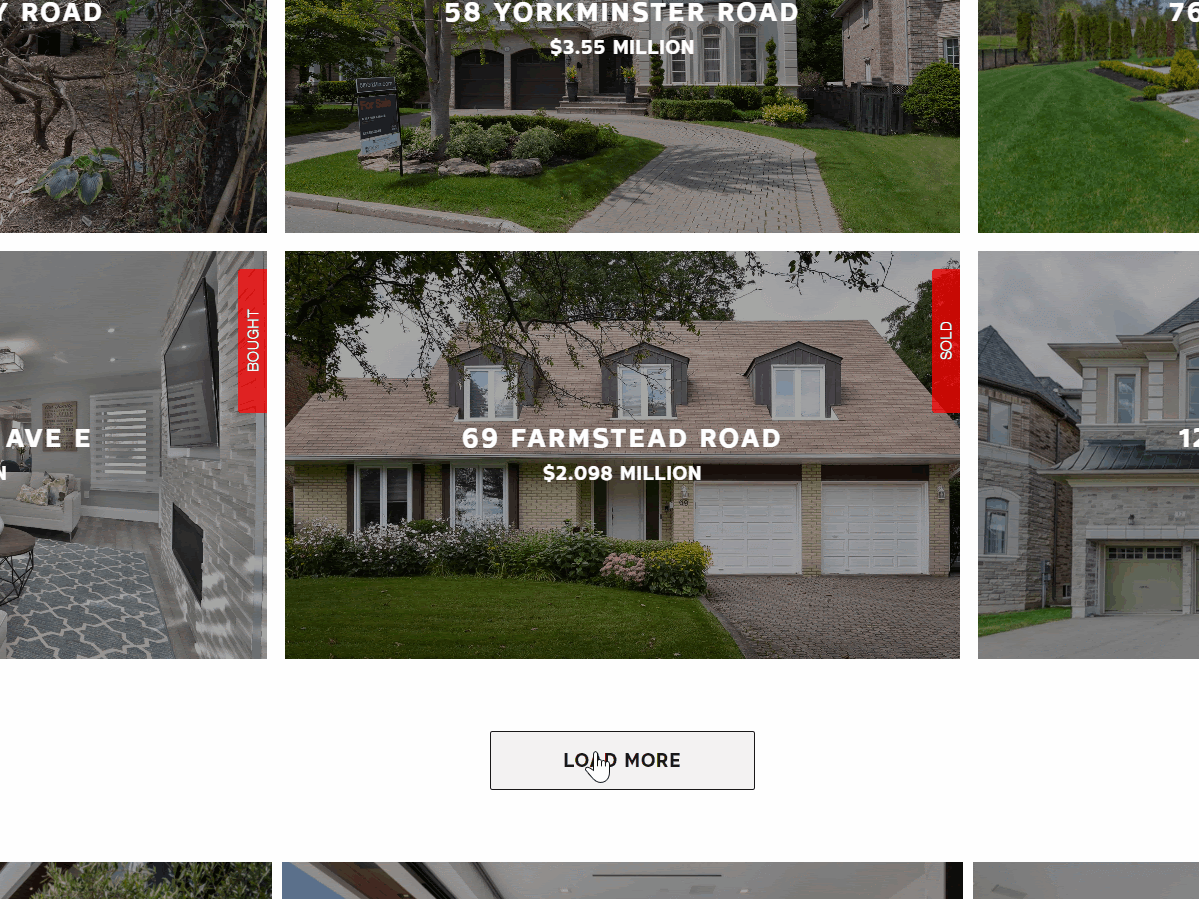
Why 6? For aesthetic reasons. On desktop, we display three big boxes with content per row, and this collection field fits the full-screen size. And we change it to 2 to work on tablet and mobile. Loading 6 more allows us to keep the rows always filled in unless we pull in the remaining items.
A quick tip: How many items should you have per page? The UX researchers say that the best quantity users perceive well is 8-12 items per page, 2-3 items per row.
Create a CMS collection of properties if you don’t have one.

For a quick start, you can create a collection of blog posts, name it 'Blog', give it collection fields such as title, short description, image, content, etc., and fill it in with dummy content.
Open the 'Add Elements' panel, select 'Collection list' element and drag it into the visual canvas.
Then give all its children elements classes:

Then link this collection list to the CMS collection of properties by clicking the gear icon and selecting the source.
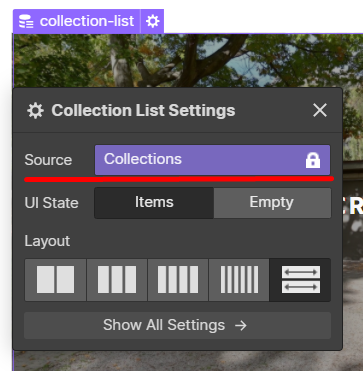
Style the 'collection list' and 'collection-list-item' the way you want.
Select the 'Collection list' element and open its settings panel. There check 'Paginate items' and set 'Items/page' to 6.
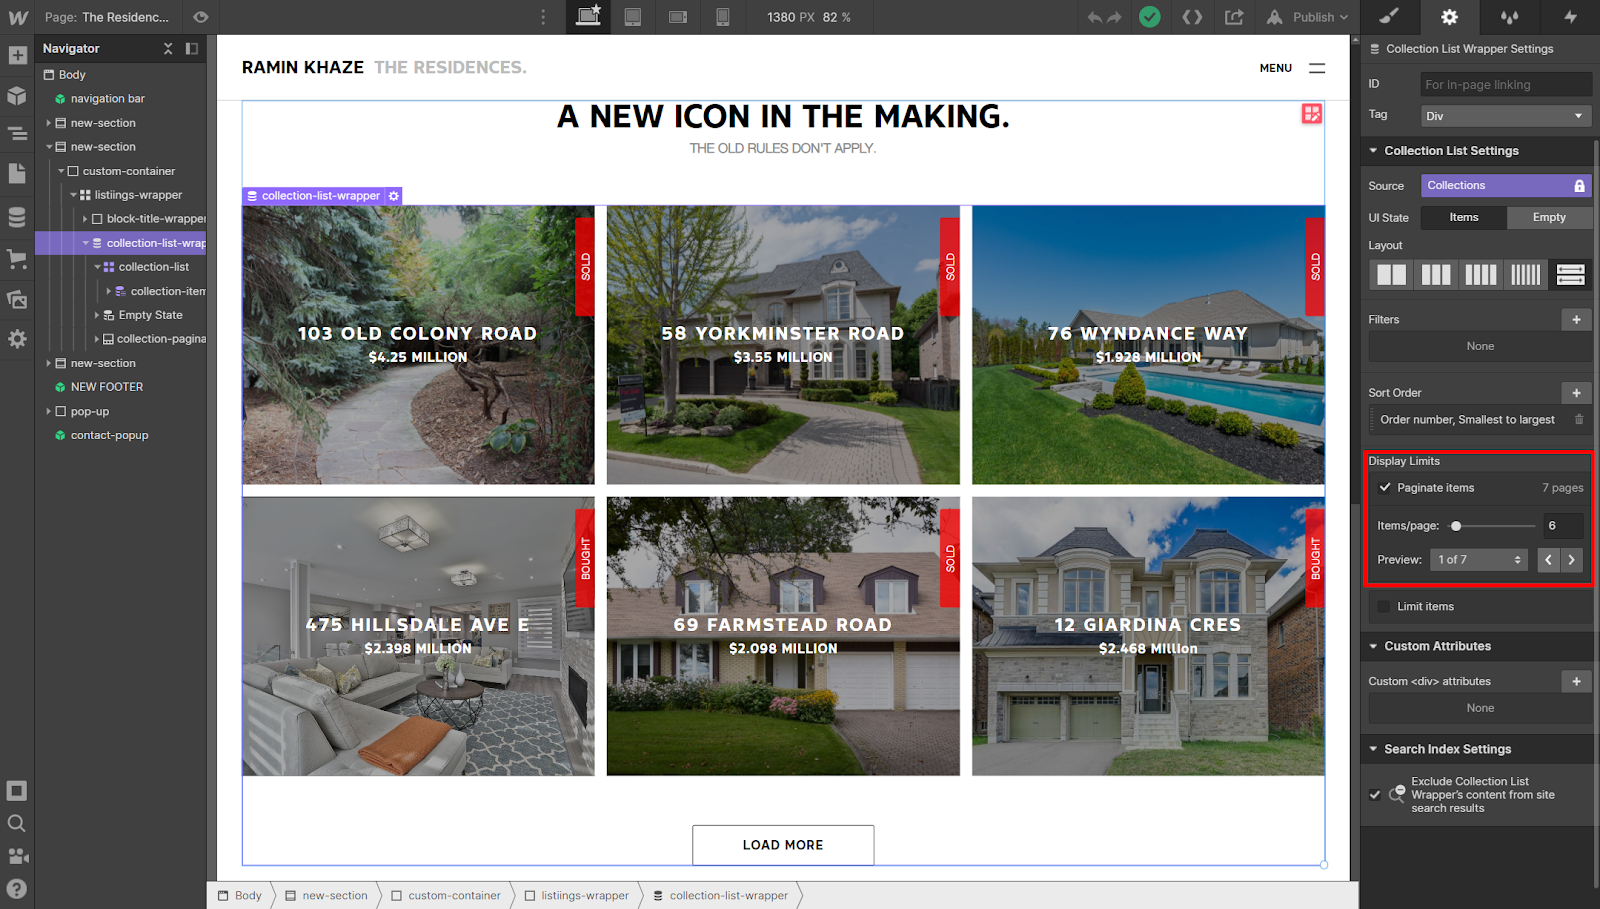
Good news: you can set any number you want! The code will work! Just remember, if you put 6, you will load 6 more on click. If 8 - then you'll load 8. That's how it works.
And now, when you enabled the pagination, open the 'Navigator' panel and find the collection list pagination buttons there:
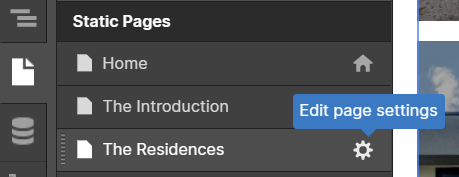
Go to the page settings and scroll down to the 'Before </body> tag' custom code field.
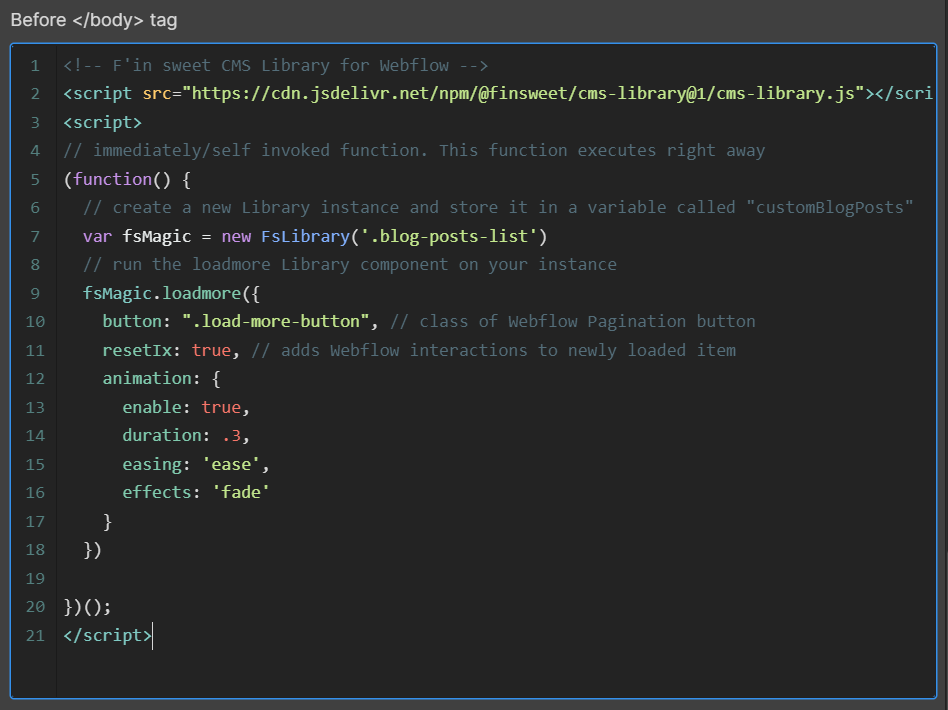
Paste there the custom code kindly provided for free by Finsweet company. You can copy the code from my account on GitHub.
All the custom code-related things work only on a live website. So to see the changes you’ve made and test them, publish your project and open it.
Everything works!
That's how you can easily replace the pagination with load-more content on click.
Webflow requires a paid plan to start using the custom code fields. So if you want to create projects with custom code elements, you should get a paid site hosting plan or a paid workspace plan.
So go on and try building a CMS with a load more button yourself - it's easy!
If you're just getting started, check out the new Webflow 101 course rebuilt and reshoot for new users to help them get started with Webflow under 16 lessons or under 2 hours. Upon completion, you will receive a certificate and can start building fully functioning websites.
Also, check out Webflow website templates that I designed. Use them to kick-start building your next project. Cheers!
Build beautiful and fully responsive websites in no-code that work perfectly on all devices